
Looking for creative DIY Christmas holiday decorations to make your home feel more festive? Making your own holiday decor is a simple and budget-friendly way to add personality, warmth, and a handmade touch to your space. From beautiful wreaths and handmade ornaments to cozy table centerpieces and festive accents, DIY projects can make holiday decorating feel more personal and meaningful.
One of the best things about DIY holiday decorations is that you don’t need to be an expert crafter. Many projects can be made with simple materials you may already have at home, making them perfect for beginners. You can also get the whole family involved and turn decorating into a fun holiday activity.
In this collection, you’ll find 24 easy DIY holiday decoration ideas for a variety of styles and skill levels. Whether you prefer rustic, traditional, modern, or cozy holiday decor, these creative ideas will help you decorate your home beautifully without spending a lot of money. Grab your craft supplies and get ready to create some festive decorations you’ll love displaying throughout the holiday season.
How to Make Dried Orange Christmas Ornaments
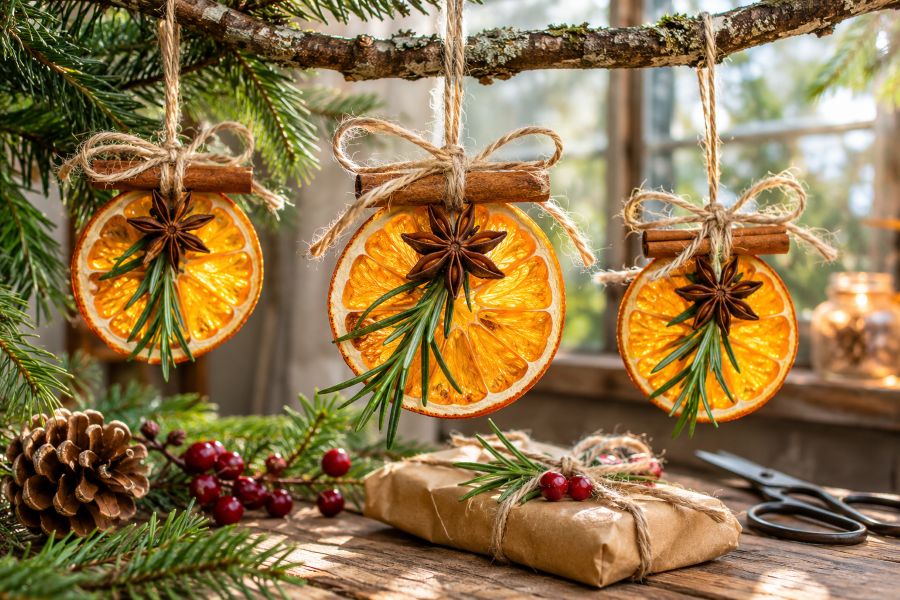
These rustic Christmas ornaments are easy to make and require just a few natural materials.
You’ll need:
- Dried orange slices
- Cinnamon sticks
- Star anise
- Fresh rosemary
- Jute or twine
- Scissors
Instructions:
- Prepare the orange slices: Slice oranges into thin, even rounds and pat them dry. Place them on a baking sheet and dry them in a low-temperature oven until they become firm and slightly translucent. Let them cool completely.
- Add the decorations: Place a cinnamon stick across the top of each orange slice and attach it with a small piece of jute twine.
- Decorate the center: Tie a star anise and a small sprig of rosemary onto the orange slice for a natural festive touch.
- Create the hanger: Cut a longer piece of twine, loop it around the cinnamon stick, and tie a small bow at the top.
- Hang and enjoy: Place the finished ornaments on your Christmas tree, a decorative branch, wreath, or holiday garland.
Tip: Make several ornaments in slightly different sizes and arrangements to create a more natural, handmade look.
DIY Autumn Leaf Hanging
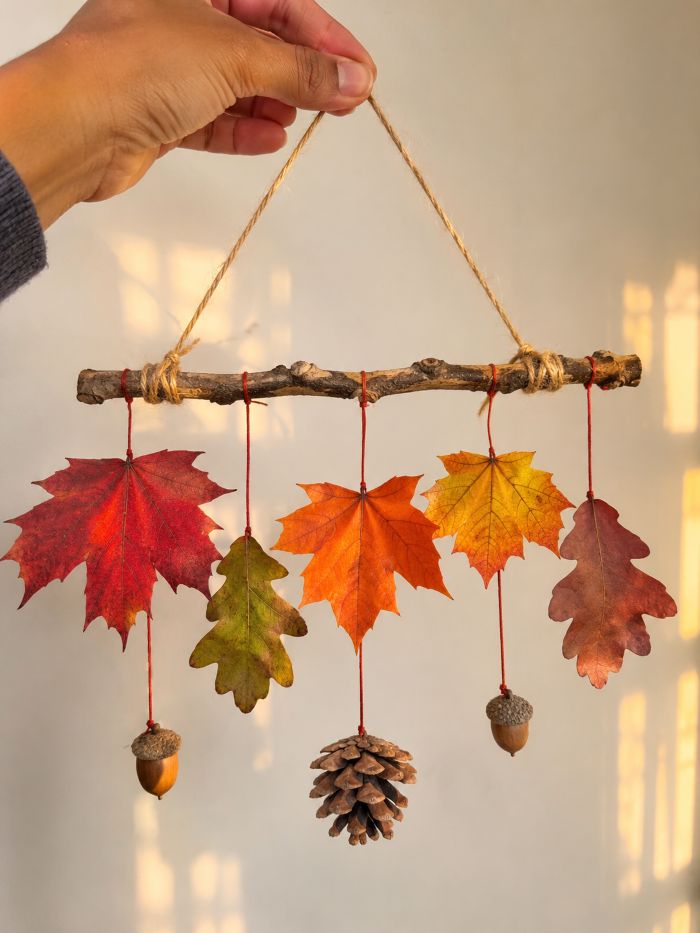
Bring the colors of fall indoors with this simple DIY autumn leaf hanging. A small rustic twig is decorated with colorful maple and oak leaves, pine cones, and acorns, creating an easy nature-inspired decoration for a wall, window, entryway, or cozy corner. The combination of red, orange, yellow, green, and brown leaves gives the piece a warm seasonal feel while keeping the project inexpensive and easy to recreate.
How to Make It
Collect a few colorful fallen leaves, a small sturdy twig, jute twine, thin red thread, pine cones, and acorns. Tie a piece of twine to both ends of the twig to create a hanger. Then attach the leaves at different lengths using the red thread. Finish by hanging a few acorns and a pine cone from the lower sections to add texture and dimension. Hang the finished piece near a window or on a plain wall where the natural colors can stand out.
DIY Rustic Snowman Christmas Ornaments
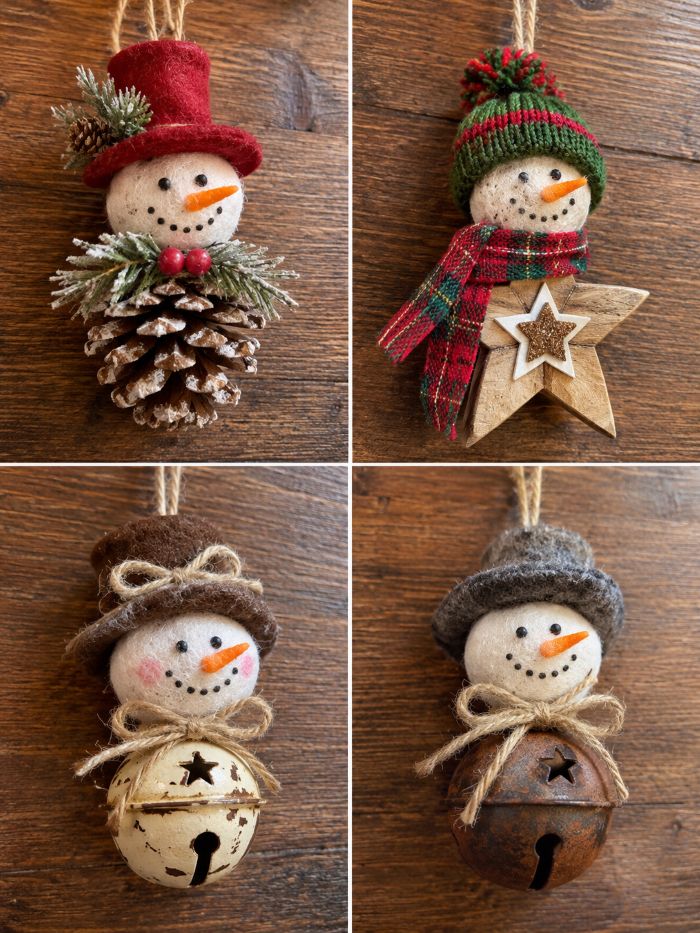
Give your Christmas tree a cozy handmade touch with these adorable rustic snowman ornaments. Each design combines simple materials such as felt, jute twine, pine cones, wooden stars, and vintage-style jingle bells to create a charming farmhouse Christmas look. The different hats, scarves, greenery, and small decorative details make each snowman unique while keeping the overall style warm and festive.
How to Make Them
Start with a small round piece of off-white felt or a lightweight wooden ball for the snowman’s head. Add tiny black dots for the eyes and smile, then use a small piece of orange felt for the carrot nose. For the body, you can use a pine cone, wooden star, or vintage-style metal bell.
Finish each snowman with a miniature felt hat, knitted beanie, scarf, or jute bow. Add small details such as pine sprigs, berries, or glitter stars to personalize the design. Finally, attach a loop of jute twine at the top so the finished snowman can hang easily from your Christmas tree.
These ornaments are especially fun to make as a family because you can mix and match different materials to create your own collection of unique little snowmen.
How to Make a Cinnamon Stick Christmas Star
Materials:
- 5 cinnamon sticks
- Natural twine
- A few sprigs of evergreen or juniper
- Star anise
- Small pine cones
- Red berries
- Small jingle bell
- 2–3 extra cinnamon sticks
Instructions:
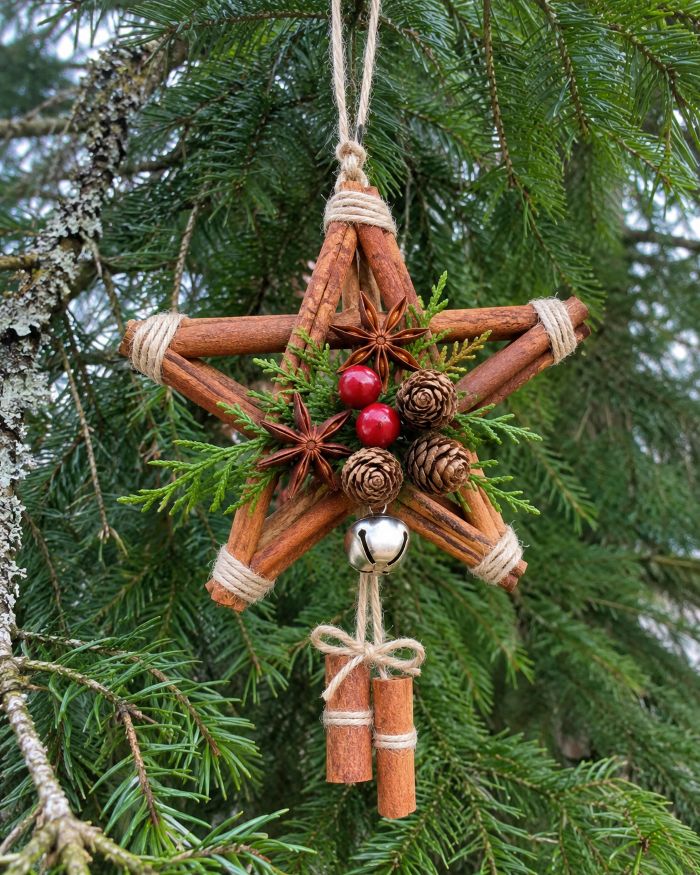
- Make the star: Arrange five cinnamon sticks into a five-pointed star, overlapping the ends.
- Tie the joints: Secure each corner tightly with thin twine. Add extra knots if needed to keep the shape sturdy.
- Add greenery: Tuck a small sprig of evergreen into the center of the star and secure it with twine.
- Decorate: Attach star anise, small pine cones, and red berries around the center. Add a small jingle bell for a festive touch.
- Create the hanger: Tie two pieces of twine to the top of the star and join them into a loop for hanging.
- Add the finishing touch: Tie a couple of cinnamon sticks together with twine and let them hang below the star.
Hang your finished ornament on a Christmas tree, wreath, door, or even a festive garland for a simple rustic look.
DIY Wood Slice Animal Christmas Ornaments
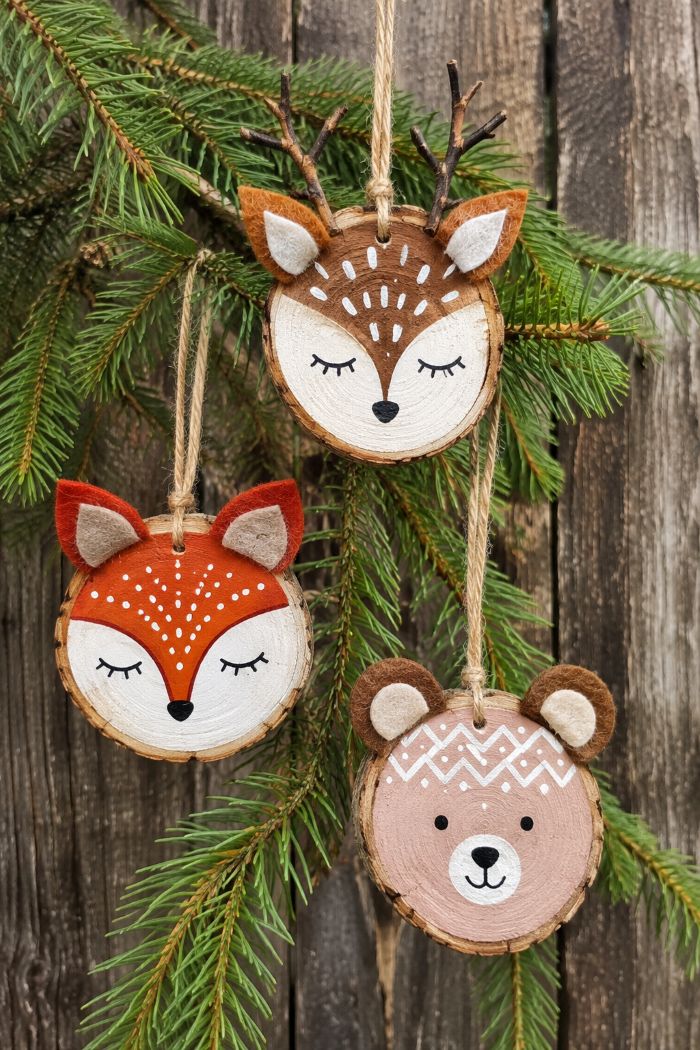
Add a charming woodland touch to your Christmas tree with these handmade wood slice animal ornaments. Birch wood slices are painted with simple deer, fox, and bear faces, then finished with felt ears, twig antlers, and rustic jute twine. They’re easy to personalize and make a cozy addition to farmhouse, woodland, or nature-inspired holiday decor.
How to Make Them
Start with small round wood slices and lightly sand the surface while keeping the natural bark edge intact. Paint simple animal faces using basic colors and let them dry completely. Add felt ears and twig antlers where needed, then paint small details such as eyes, noses, and decorative markings. Finally, attach a loop of jute twine through a small hole at the top so each ornament can hang from the Christmas tree.
DIY Rustic Twig Star Christmas Decoration
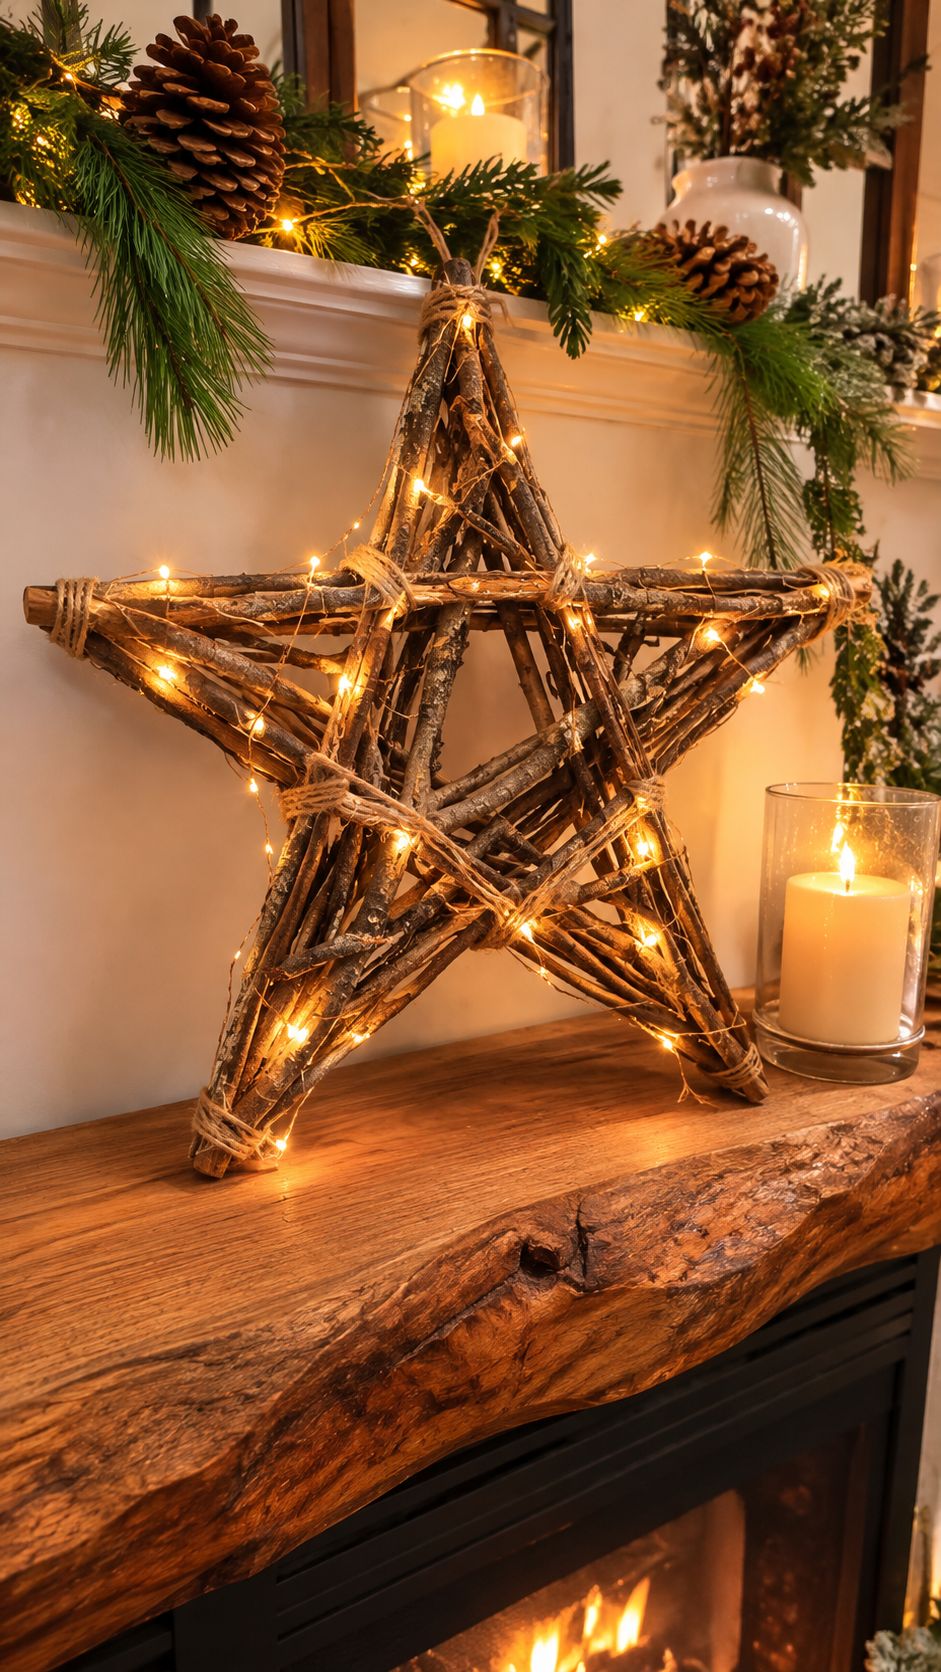
Bring a cozy woodland feel to your holiday decor with this large handmade twig star. Made from natural branches, jute twine, and warm fairy lights, it creates a beautiful rustic centerpiece for a fireplace mantel. Pair it with evergreen branches, pine cones, and candles for an inviting Christmas display.
How to Make It
Collect several straight twigs and arrange them into a five-pointed star. Overlap the ends and secure each joint tightly with natural jute twine. Add a few smaller branches across the inside of the star for extra texture and strength. Wrap a thin string of warm white fairy lights loosely around the branches, keeping the battery pack hidden behind the decoration. Place the finished star on a mantel and surround it with greenery and pine cones for a warm farmhouse-inspired Christmas look.
Christmas Wreaths on a Window
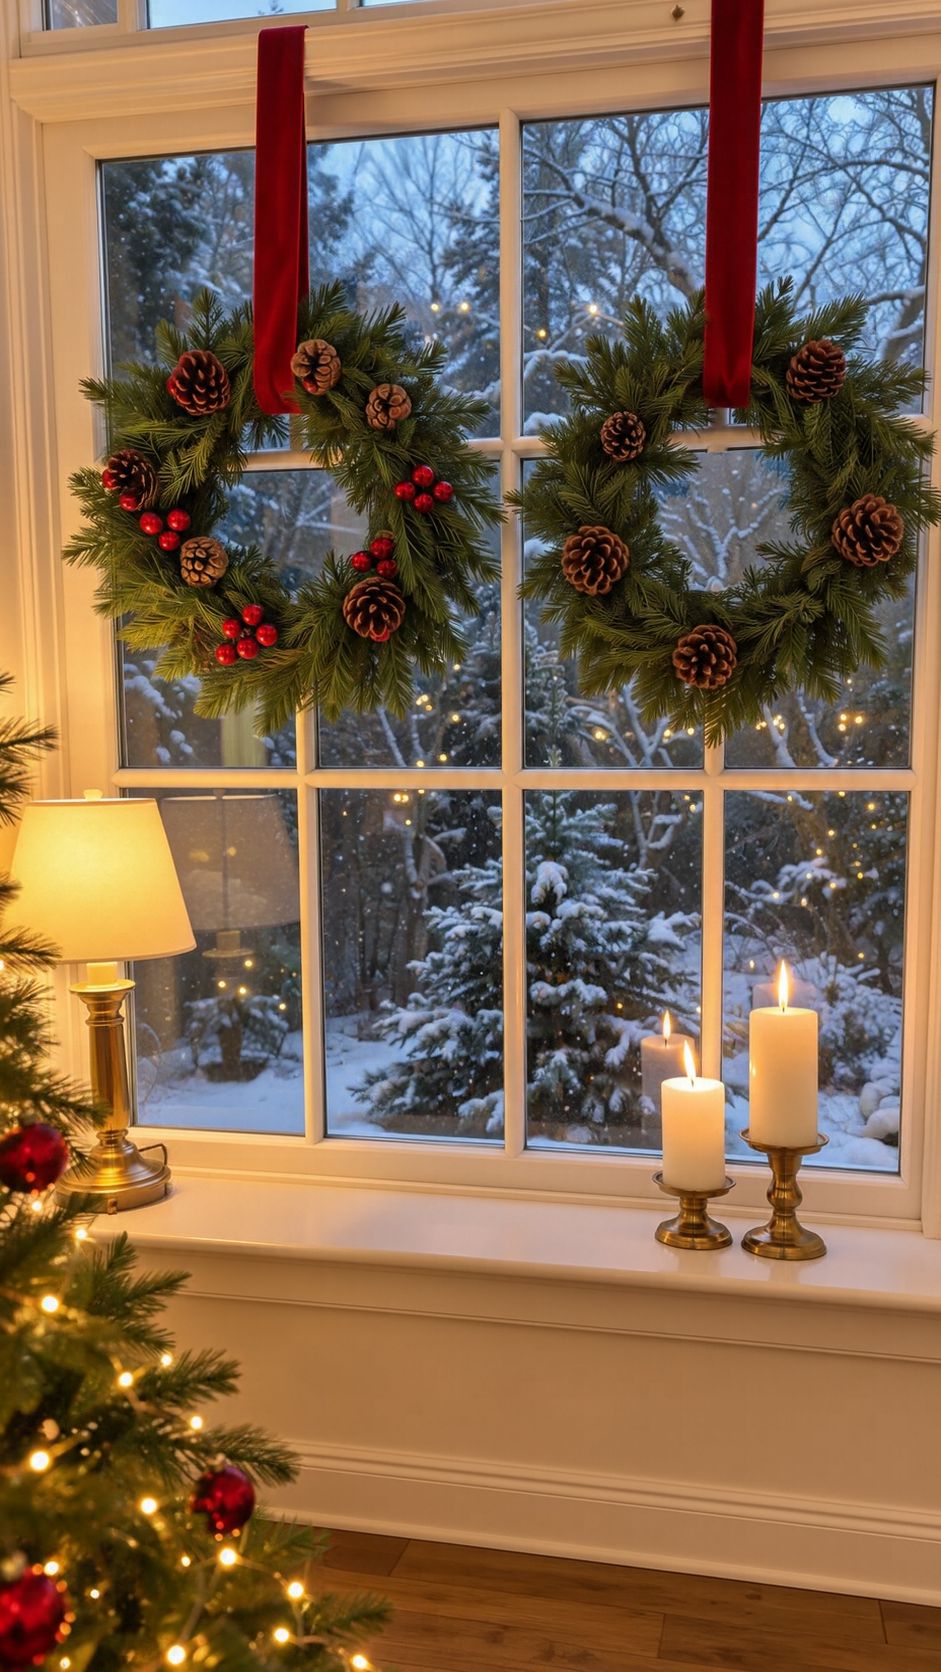
Turn an ordinary window into a cozy Christmas display with fresh evergreen wreaths hung from wide red velvet ribbons. Pine cones and red berries add festive color, while candles and warm lights create a beautiful contrast against the cool, snowy evening outside.
How to Create the Look
Choose two fresh or faux evergreen wreaths and decorate them with pine cones, berries, or other natural accents. Hang each wreath from a wide ribbon looped securely over the top of the window frame. Keep the decorations slightly different for a relaxed, collected look. Finish the windowsill with pillar candles, a small lamp, or a few extra sprigs of greenery to create a warm and inviting holiday atmosphere.
Minimalist Birch Branch Christmas Tree
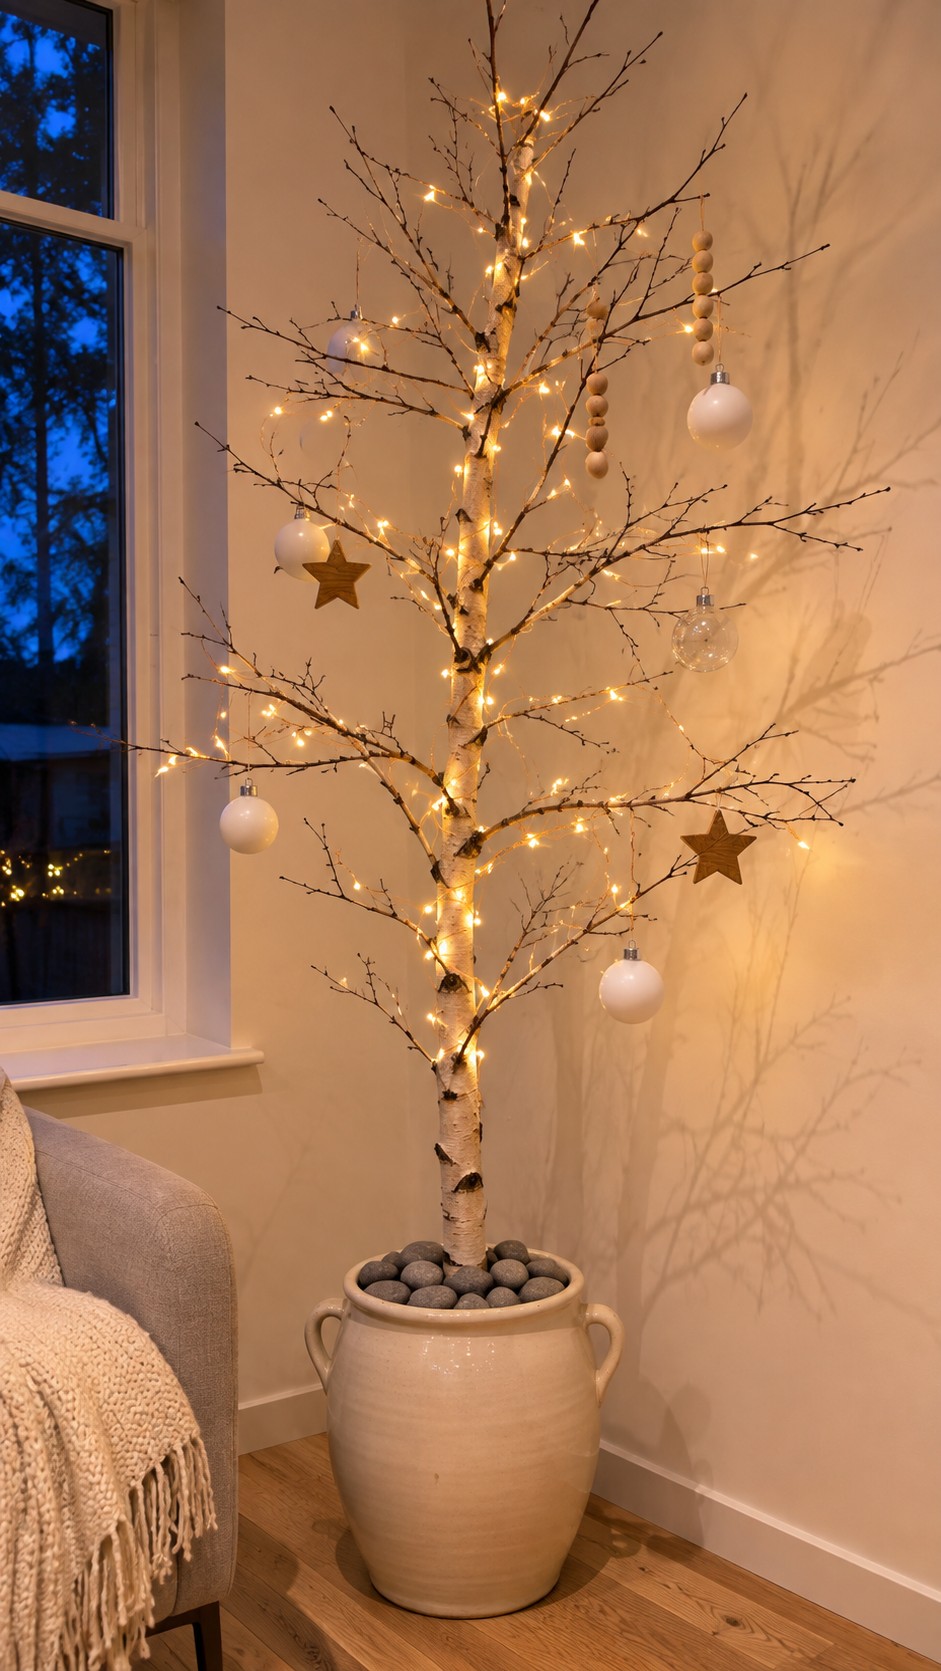
For a simple and elegant holiday look, turn a bare birch branch into a beautiful Christmas tree. Placed in a ceramic pot filled with smooth river stones and decorated with warm fairy lights, white baubles, wooden stars, and natural beads, this DIY tree adds a cozy Scandinavian-inspired touch without taking up much space.
How to Make It
Choose a tall, sturdy birch branch with plenty of smaller twigs. Place it securely in a large ceramic pot and fill the top with smooth stones to keep it stable. Wrap warm white fairy lights around the trunk and branches, then hang a few simple ornaments such as white baubles, wooden stars, and bead garlands. Keep the decorations minimal so the natural shape of the branch remains the main feature.
DIY Christmas Winter Scene in a Jar
Create a miniature Christmas wonderland inside a glass jar using fake snow, tiny deer figurines, bottle-brush trees, and warm fairy lights. This simple decoration brings a cozy woodland feel to a kitchen counter, mantel, shelf, or holiday table and can be customized with small seasonal details.
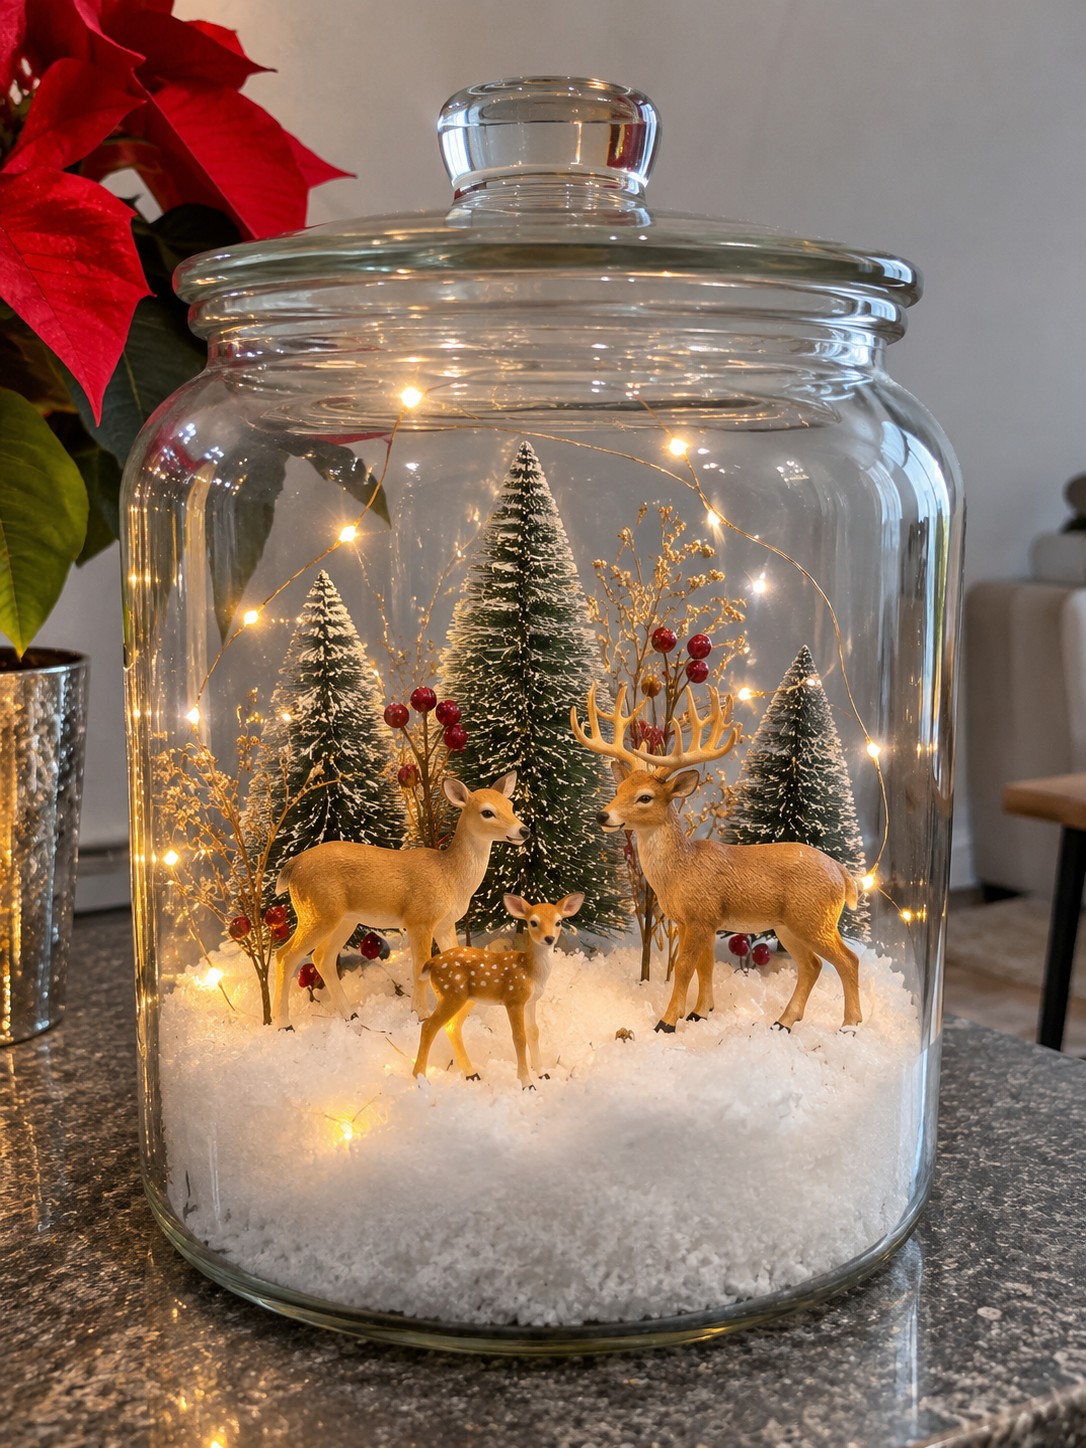
How to Make It
Start by adding a layer of artificial snow to the bottom of a large clear glass jar. Arrange three small deer figurines on the snow, placing the larger deer toward the back and the fawn in front. Add a few miniature bottle-brush Christmas trees behind them, then tuck in dried twigs and small red berries for extra detail.
Carefully place a thin copper-wire fairy-light string around the scene, keeping the lights distributed throughout the jar. Switch them on before securing the lid, then adjust the figurines and decorations until the miniature winter scene looks balanced. Finish by placing the jar somewhere visible where the warm lights can create a cozy Christmas glow.
DIY JOY Christmas Candle Holders
Turn simple wine glasses into a charming Christmas centerpiece with this easy DIY idea. Painted matte black and topped with chunky red candles, the three holders spell JOY for a festive touch. Pine sprigs, pine cones, berries, bells, and buffalo plaid ribbon add warmth and a rustic farmhouse feel.

How to Make Them
Start with three clean wine glasses and paint the outside of each glass with matte black paint. Let them dry completely, then apply large red letters J, O, and Y to the front of the glasses.
Turn the glasses upside down and place a chunky pillar candle on the flat base of each glass. Decorate around the stem with small pine sprigs, pine cones, berries, jingle bells, and festive ornaments. Finish with a buffalo plaid and burlap ribbon bow for extra Christmas charm.
Arrange the three candle holders together on a shelf, mantel, or dining table to create a simple JOY-themed holiday display.
DIY Pom-Pom Reindeer Christmas Ornaments
Add some playful woodland charm to your Christmas tree with these adorable pom-pom reindeer ornaments. Made with fluffy yarn, small wooden reindeer faces, cotton cord, and wooden beads, they’re simple to make and perfect for a cozy handmade holiday display.
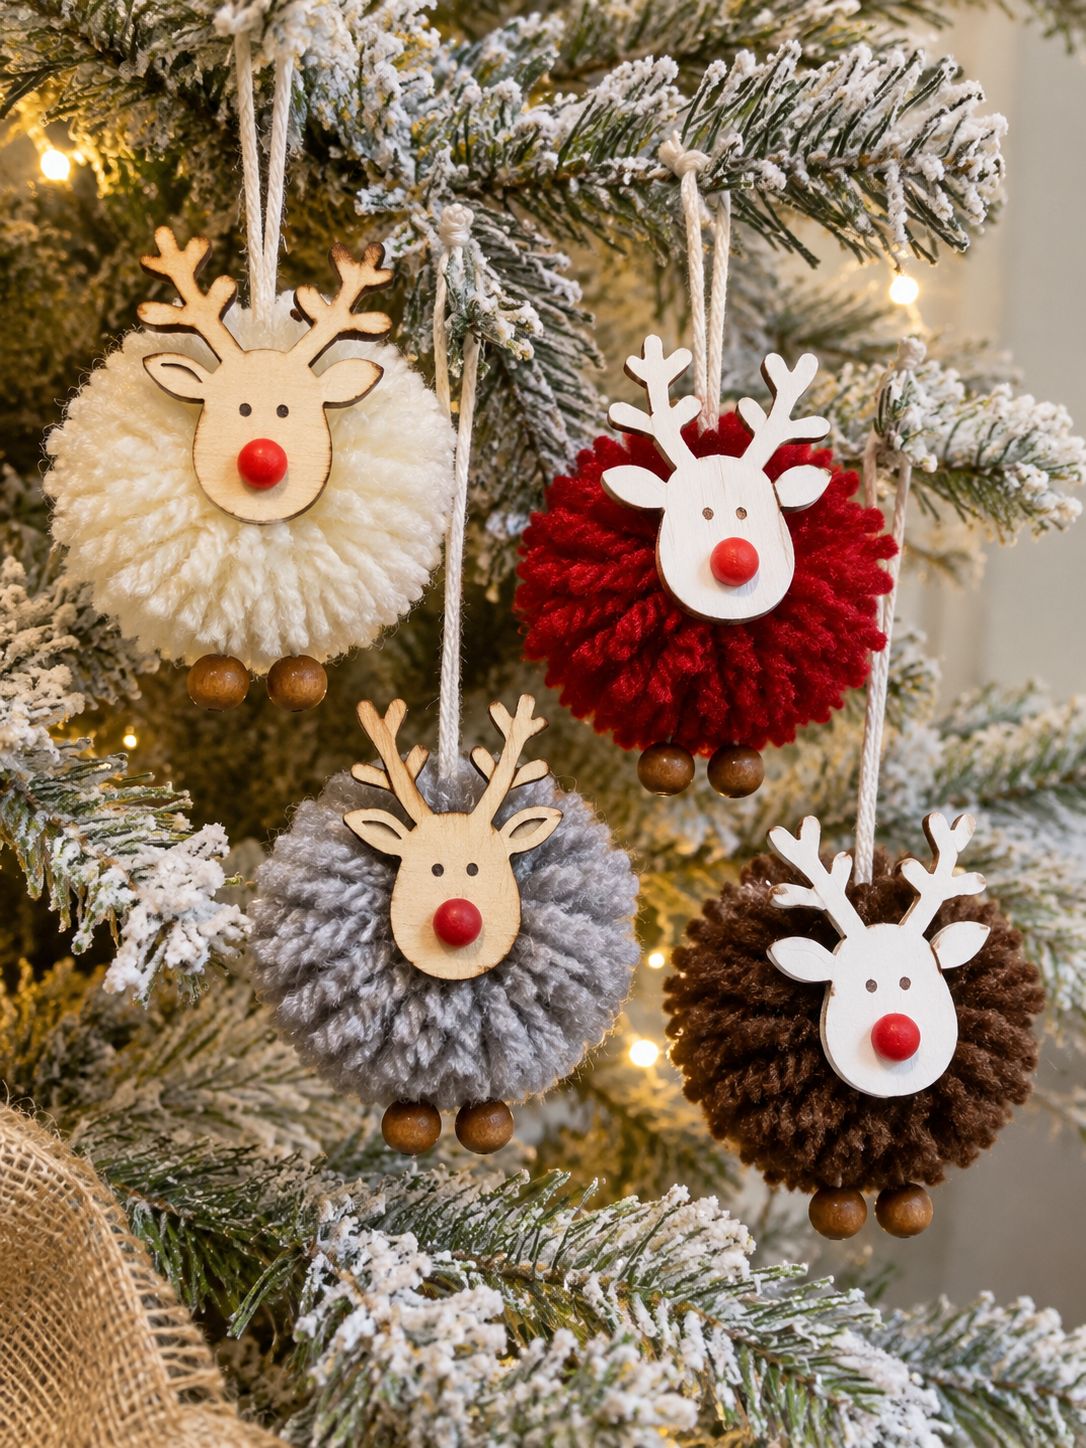
How to Make Them
Start by making fluffy yarn pom-poms in your favorite Christmas colors. Trim the yarn into a round shape, leaving the fibers slightly uneven for a soft handmade look.
Attach a small wooden reindeer face to the front of each pom-pom using craft glue. Add a tiny red nose if the face doesn’t already have one. For the feet, glue two small wooden beads underneath the pom-pom.
Finally, tie a piece of white cotton cord around the top of each ornament, creating a small loop for hanging. Make several in different colors and hang them at varying heights on a Christmas tree or garland.
DIY Candy Cane Christmas Wreath
Give your front door a fun and festive makeover with this simple candy cane wreath. Red-and-white candy canes are arranged into heart-shaped loops, creating a cheerful flower-like design, while a white snowflake adds a pretty finishing touch. A wide red velvet ribbon completes the classic Christmas look.
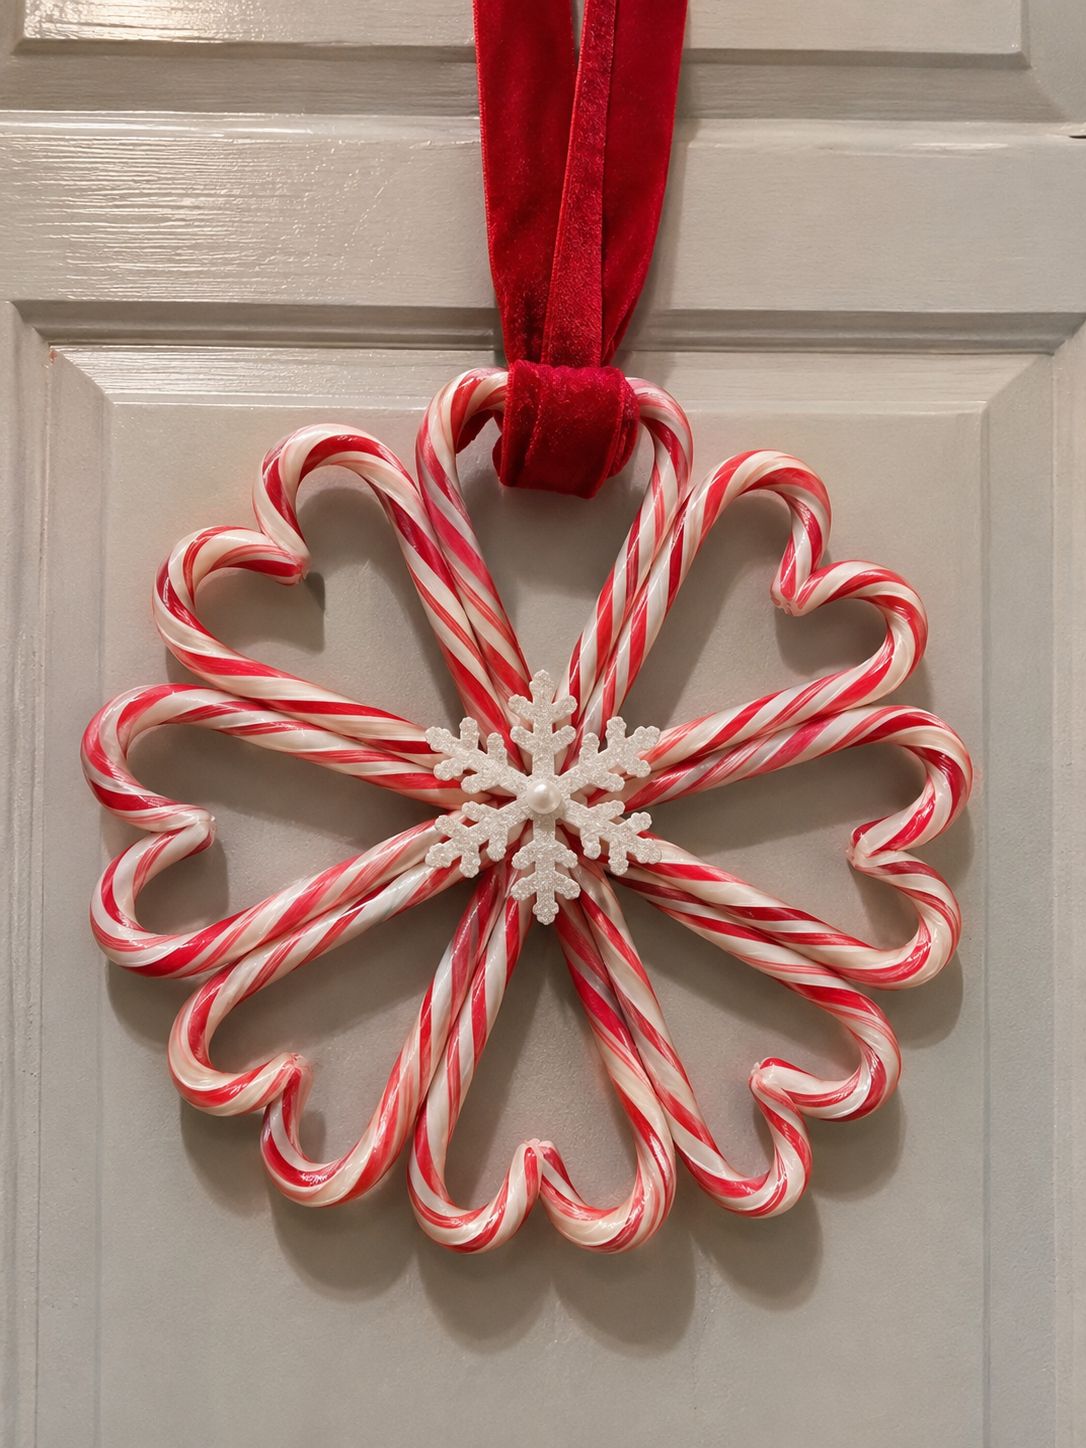
How to Make It
Arrange pairs of red-and-white candy canes so their curved ends form heart shapes, with the straight ends meeting toward the center. Continue arranging the pairs in a circle until you have a full wreath shape.
Secure the candy canes together carefully with small pieces of strong adhesive or clear craft glue. Cover the center joins with a decorative snowflake ornament or another festive embellishment. Finally, attach a wide red ribbon at the top and use it to hang the wreath from your door.
For a reusable version, consider using decorative plastic candy canes instead of real candy canes.
DIY Christmas Ornament Frame
Turn an old picture frame into a festive Christmas wall decoration with this simple upcycling project. A glossy red frame, oversized green bow, and three colorful baubles create a cheerful holiday display that works beautifully on a beadboard wall, entryway, mantel, or shelf.
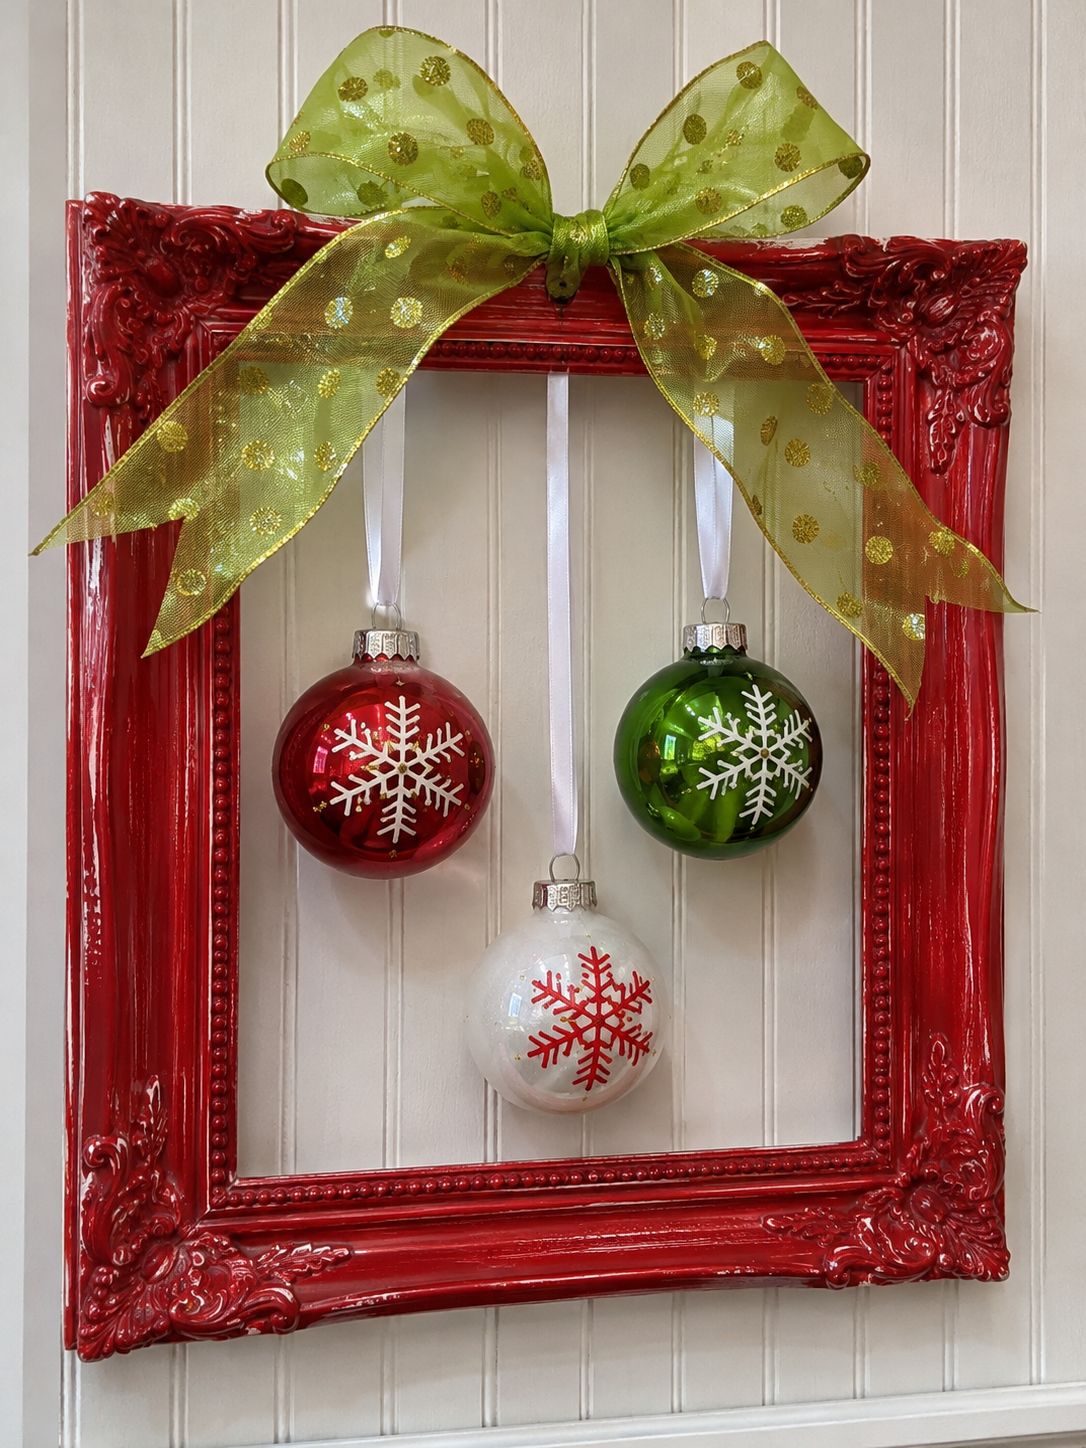
How to Make It
Start with an old decorative picture frame and remove the glass and backing. Paint the frame red and let it dry completely. Once the paint has cured, tie a large festive ribbon bow to the top center of the frame.
Cut three pieces of satin ribbon in different lengths and attach a Christmas bauble to the end of each one. Secure the ribbons to the inside top of the frame so the ornaments hang at different heights. Choose contrasting colors such as red, green, and white to create a classic Christmas look.
Hang the finished frame on the wall and adjust the ribbons until the ornaments are evenly spaced. For an extra festive touch, add small pine sprigs, bells, or other lightweight decorations around the frame.
DIY Rustic Christmas Bird Centerpiece
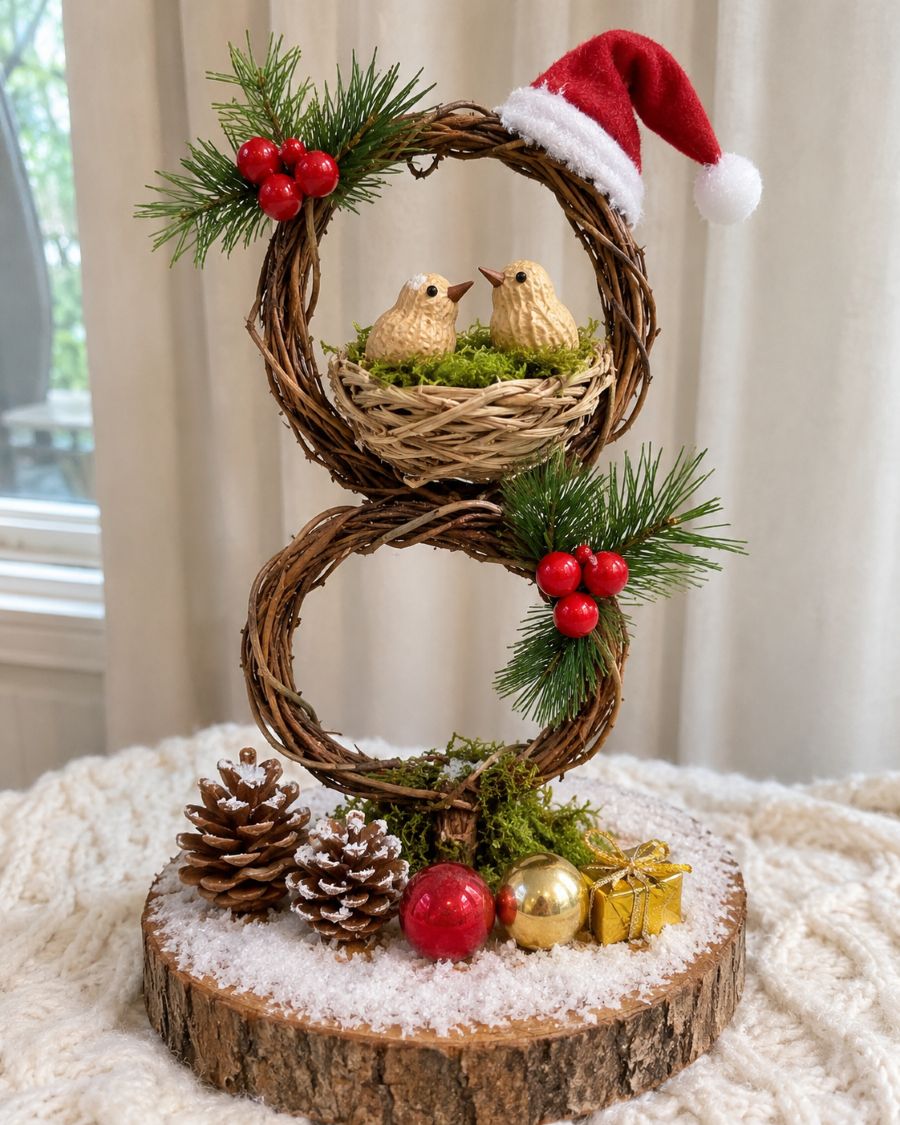
Bring a little woodland charm to your Christmas table with this adorable handmade bird centerpiece. A twisted grapevine figure-eight, tiny bird nest, moss, pine greenery, berries, and miniature ornaments come together on a rustic wood slice to create a cozy natural holiday display. The small Santa hat adds a playful festive touch, making this a fun decoration for a dining table, mantel, shelf, or entryway.
How to Make It
Start with a round wood slice and cover the top lightly with faux snow. Create two connected loops using flexible grapevine twigs, securing the joints with thin wire or twine. Let the lower loop extend into a short stem and secure it upright on a small patch of moss.
Place a small woven nest inside the upper loop and line it with green moss. Add two tiny handmade birds to the nest, then decorate the twig loops with small pine sprigs and red berries.
Finish the centerpiece with a miniature Santa hat, pine cones, red and gold ornaments, and a tiny gift box. Arrange everything loosely around the base to create a natural, slightly imperfect woodland Christmas scene.
DIY Gingerbread Man Christmas Ceiling Decorations
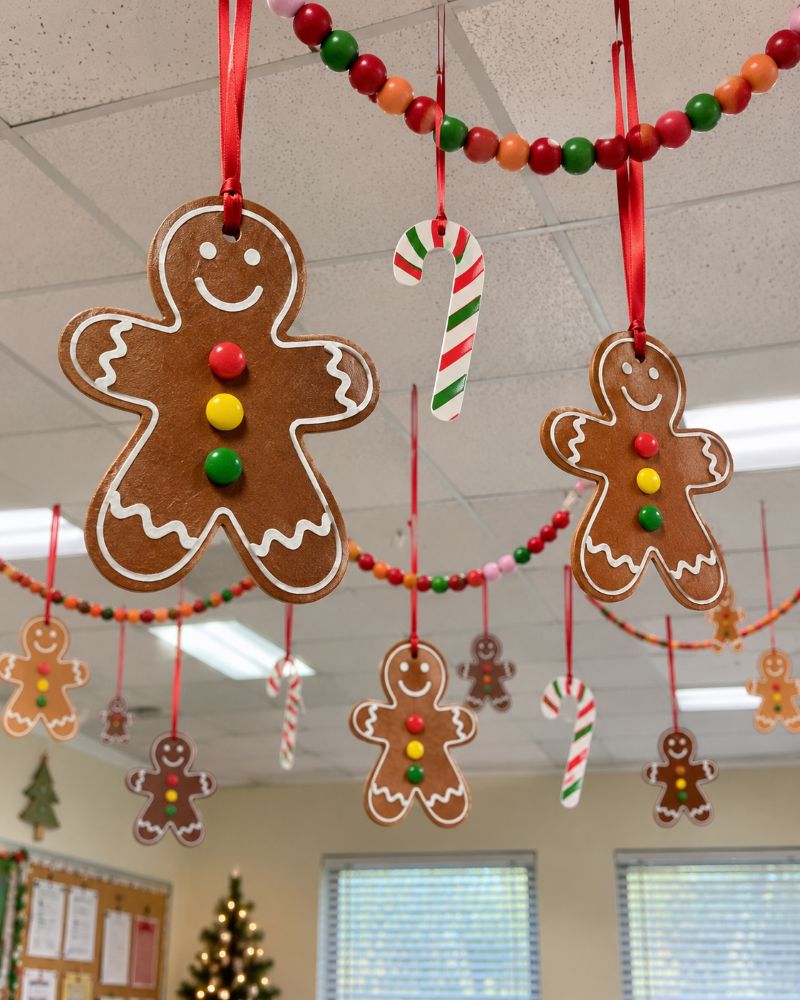
Turn a classroom, office, or party space into a cheerful Christmas wonderland with hanging gingerbread men. Brown gingerbread cutouts decorated with white icing details and colorful buttons create a playful holiday display, while paper candy canes and bright bead garlands add even more festive color.
How to Make Them
Cut gingerbread man shapes from sturdy brown craft foam or thick cardboard. Decorate each one with white paint or a paint pen to create icing outlines, zigzag details, and a simple smiling face. Add three colorful buttons down the front using craft foam, paper circles, or lightweight embellishments.
Punch a small hole near the top of each gingerbread man and thread a piece of red ribbon through it. Hang the decorations from the ceiling at different heights to create depth. Add paper candy canes between them and drape colorful bead garlands in loose swags across the ceiling.
For a classroom or office, use lightweight materials and removable hooks or approved ceiling-safe hanging methods to avoid damaging the ceiling.